Dad – Typography quilled card

It was Father’s day yesterday and I wanted to make something special for my dad. He is the best father in the world. Given me things even before I have asked for, stood by me always, made me understand my mistakes patiently and most importantly made me the person that I’m today.

I decided to make a card with the word ‘Dad’ for him. I used a patterned paper for the background and then sketched the alphabets on it. Selecting colors for the card was a challenge though. I decided to go ahead with shades of blue, green and yellow to make the card look nice and fresh. 🙂 I just had a day to finish the card and hence I decided to use tight coils and quillography to make a quick but good looking card. So here are some pics of the design and the card. Dad loved the card and has already displayed it in his showcase. Btw, this is also my entry for the Indian Quilling Guild Challenge # 1 🙂 What do you think? Did you like the design? Do share your feedback 🙂   Dad - card Dad 2Dad 3

Quilled Paper Jewelry

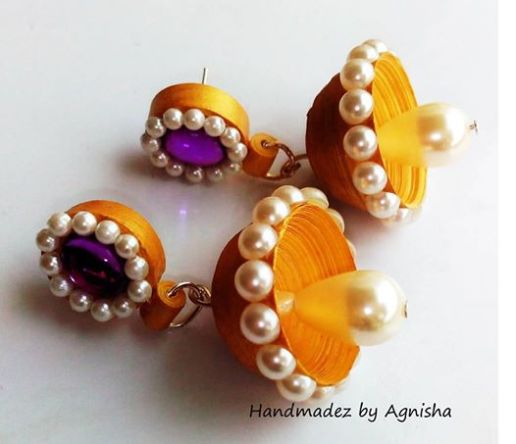
I love making paper jewelry, but haven’t made anything for months now. A couple of friends checked my FB page and loved the earlier earring designs. However, one of them wanted me to make something different, something which was only for her. So I sketched a couple of designs and converted them into paper jewelry using quilling.

So these are the initial sketch designs:Image


Image

Sorry for the bad quality pictures. My phone camera just messed these up completely 😦 The final product are wee bit different from the final design, but that’s the process of creation.

For the final pictures I borrowed my friend Unmesh’s phone and they turned out very well. Have a look:

Image

Image

Paper jewelry making is a lot of fun. None of the people who saw these designs could believe they were made of paper 🙂 My friend loved both the design and asked me to make them in different colors for her as well. Have five more requests of similar designs to be finished this weekend and am super excited about that.

Btw, I’m entering it for the Pratvam progs 1000 likes contest as well. Hope to win! 🙂

Happy Quilling!

DIY Moroccan t-light holder

So I made this Moroccan t-light holder and posted on my FB page. It was loved by many and hence I decided to come up with a tutorial which will help everyone up-cycle + have this beauty in their own house.

Image

Supplies needed: Empty Jam jar/pickle jar, solvent based glass colors, brush, glass liner (That’s it!)

Step 1: Clean the glass bottles nicely and remove all the labels.

Tip: You could soak the jars in warm water to expedite the process 🙂 Use the jar only when it is completely dry and clean.

Image

Step 2: Use solvent based glass colors to color the inside of the jar. All you would need to do it is pour the colors and swirl it till all the inside surface is coated. Use a brush only to touch up the missed areas. Let it dry for an hour at least before you touch them.

Image

Tip: Invert the jar and use the lid of the jar to drain off the excess color

The jars drying after the initial coat. I have used single coat only as I wanted to make them translucent. Too many coats will make the jar opaque and hence affect the brightness when you light a candle.

Image


Step 3: Post that use a glass liner to draw some fine intricate designs. Moroccan lamps are generally very colorful and have designs in golden or black. So you could use either of those 2 colors for making the designs.

Tip: If your freehand drawing is not good, then you could take a henna design and and stick it with tape on the inside of the jar. Then you could trace the design from outside with the glass liner. Remove the tape once done.

Image


Step 4: After your design is done, let it air dry for 2-3 hours. Do not touch the jar till then.

Tip: Use a forcep (chimta) to put the t-light inside the jar.

This is how the jars look finally with the t-light inside 🙂

This jars are now an integral part of my living room decor. Do leave your comments if you liked the work 🙂

Image

Image


DIY 3D Butterfly

Hello peeps

So finally I present my first DIY project on the blog. This is a simple idea to decorate your wall, soft board or a piece of furniture. You don’t need to be a crafting genius to do this, its simple and quick and most importantly very pretty. I was inspired by Liana Marcle’s video on YouTube. I  loved what she has done, but I have added my own twists to it. Check the step by step instructions to make your own butterfly 🙂

This is what I did with these beauties. Made my Urban Ladder mirror look pretty and dressy. Now it’s your turn!

Picture1

The 3D butterfly

Supplies needed: Butterfly prints,scissors, black acrylic paint, paint brush, wire, pearls, double sided tape or glue drop and m-seal or black clay

Step 1:Google for butterfly images online. You could pick whatever attracts your attention the most 😉

Step 2:Print them, in a size you want. I had 2 butterflies on one A4 size sheet. Pick a size basis the place you will be using them

Step 3:Cut the butterflies along the border

Step 4: Then fold the butterfly along the center (3D effect)

Step 5: Take some m-seal, mix it well and make a small cylindrical shape out of it (This for the body). You could use clay to do the same thing as well. Stick it to the center of the butterfly and let it dry. Color the shape with black acrylic color

Step 6: Get regular wire from a hardware store. Something which can be easily cut with scissors. Cut small pieces for the antenna and insert them in the m-seal or clay shape while they are still wet.

Step 7: Use a small size pearl to create the head (Not a compulsory step)

Step 8: Turn the butterfly after the m-seal/clay has dried and stick either a double sided tape or glue drop to it

Step 9:The 3D butterfly is ready for decoration!

Here is the collage of the steps. Do try it out and share your picture with me 🙂

Picture4